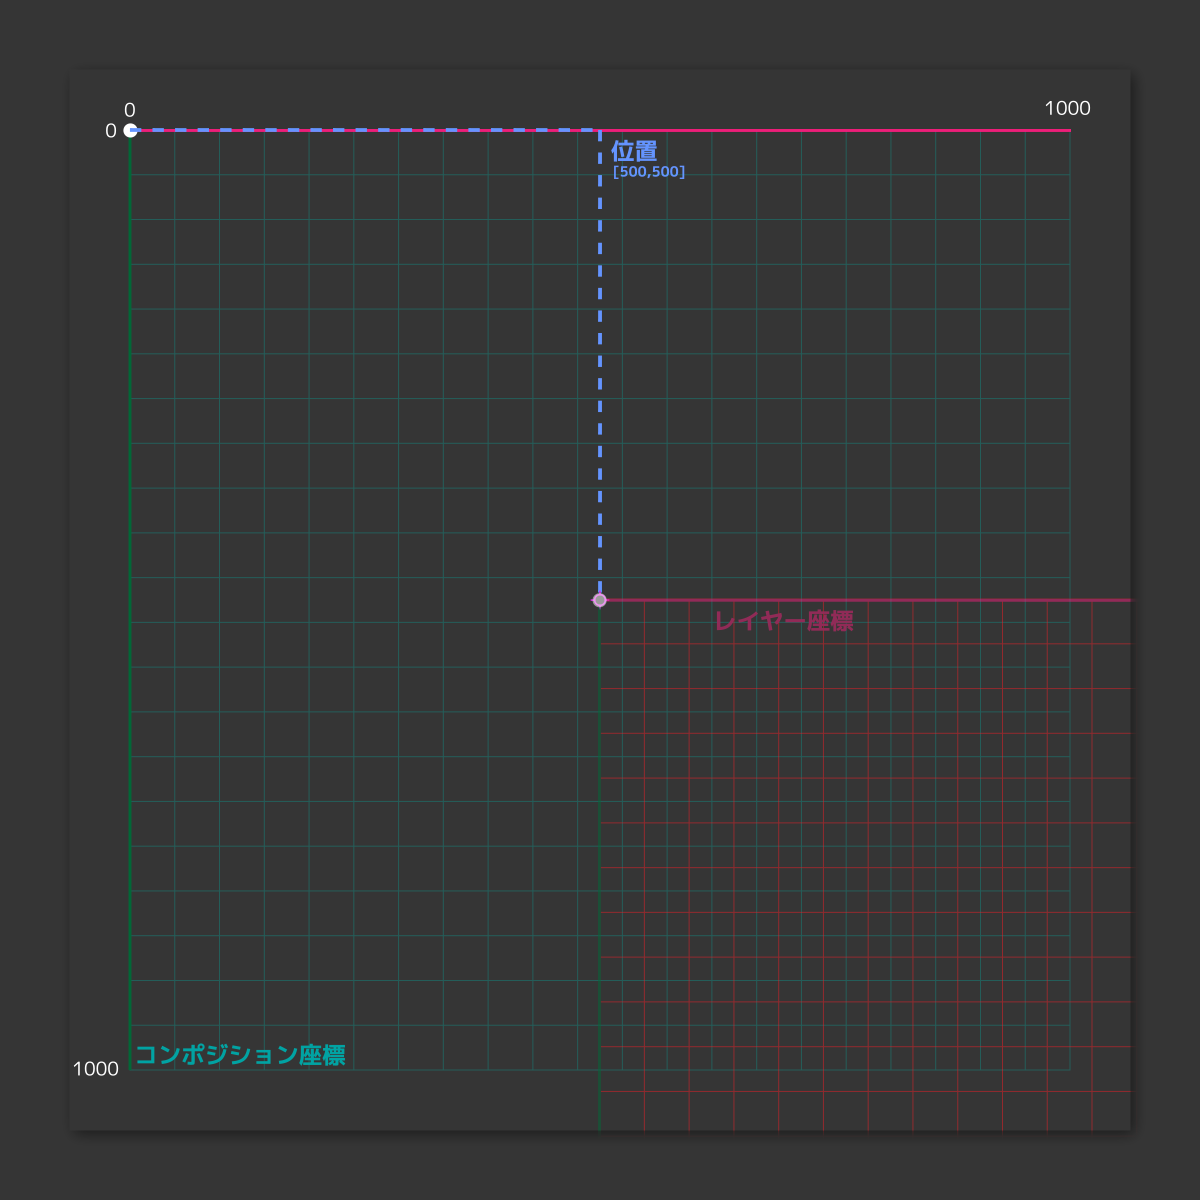
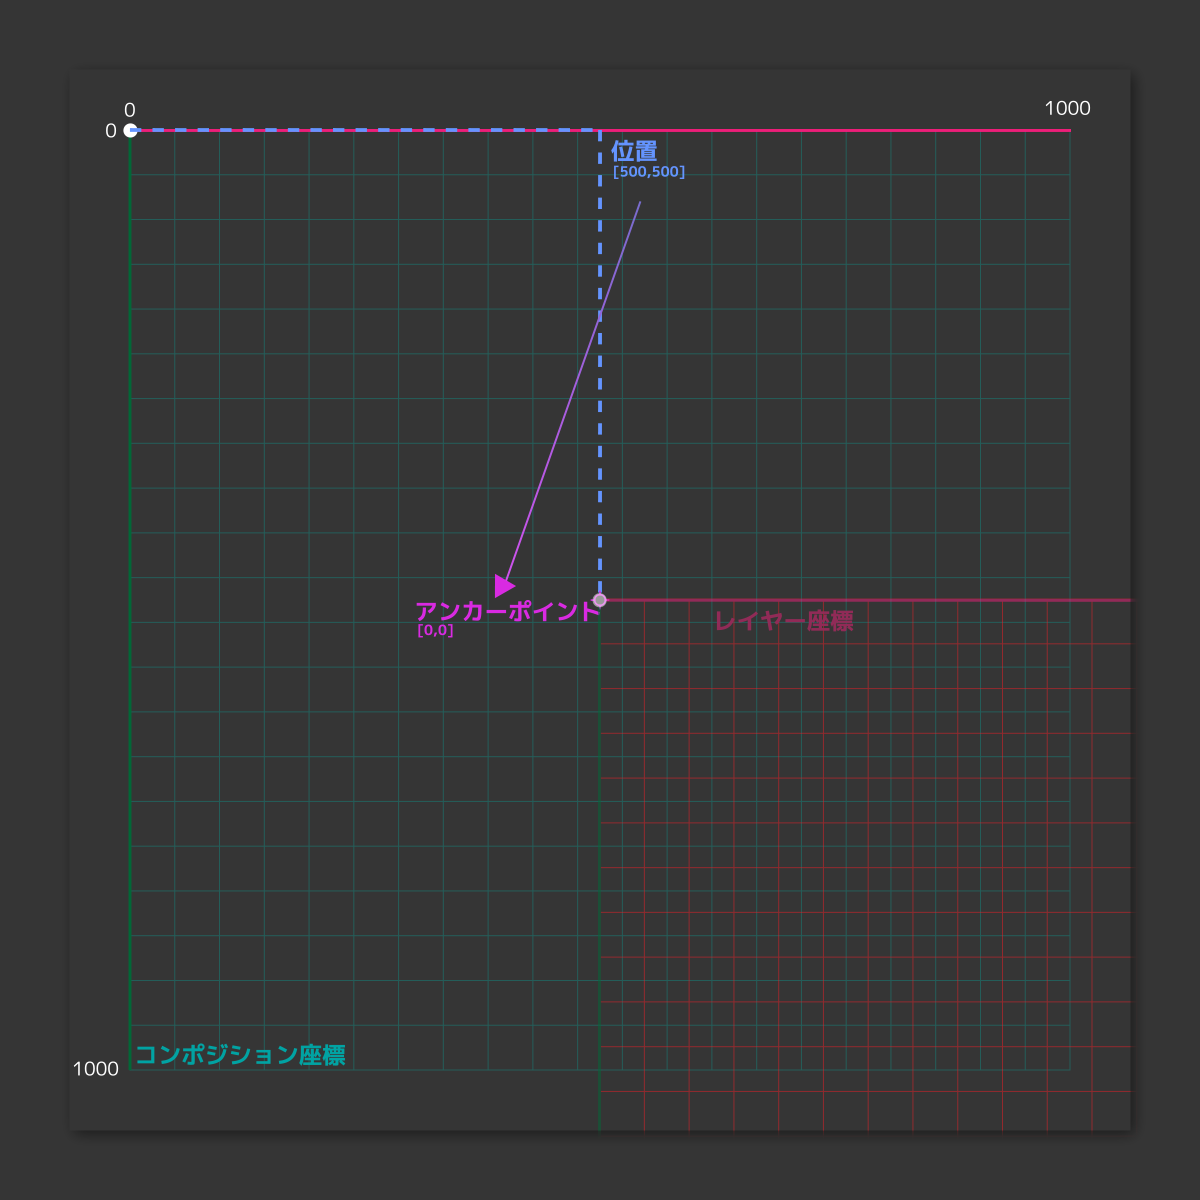
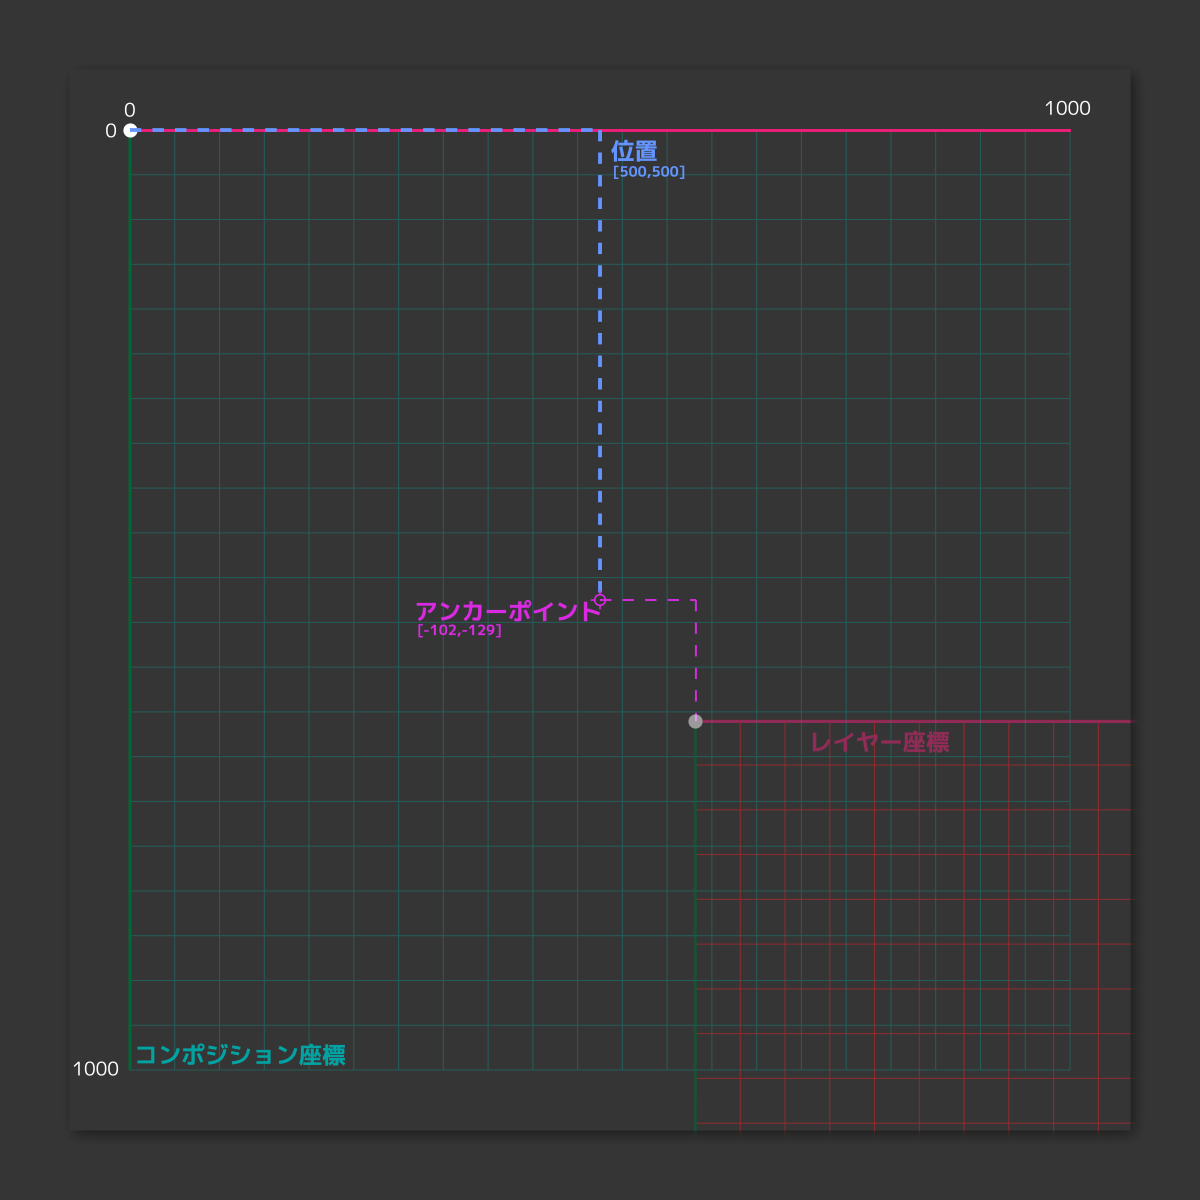
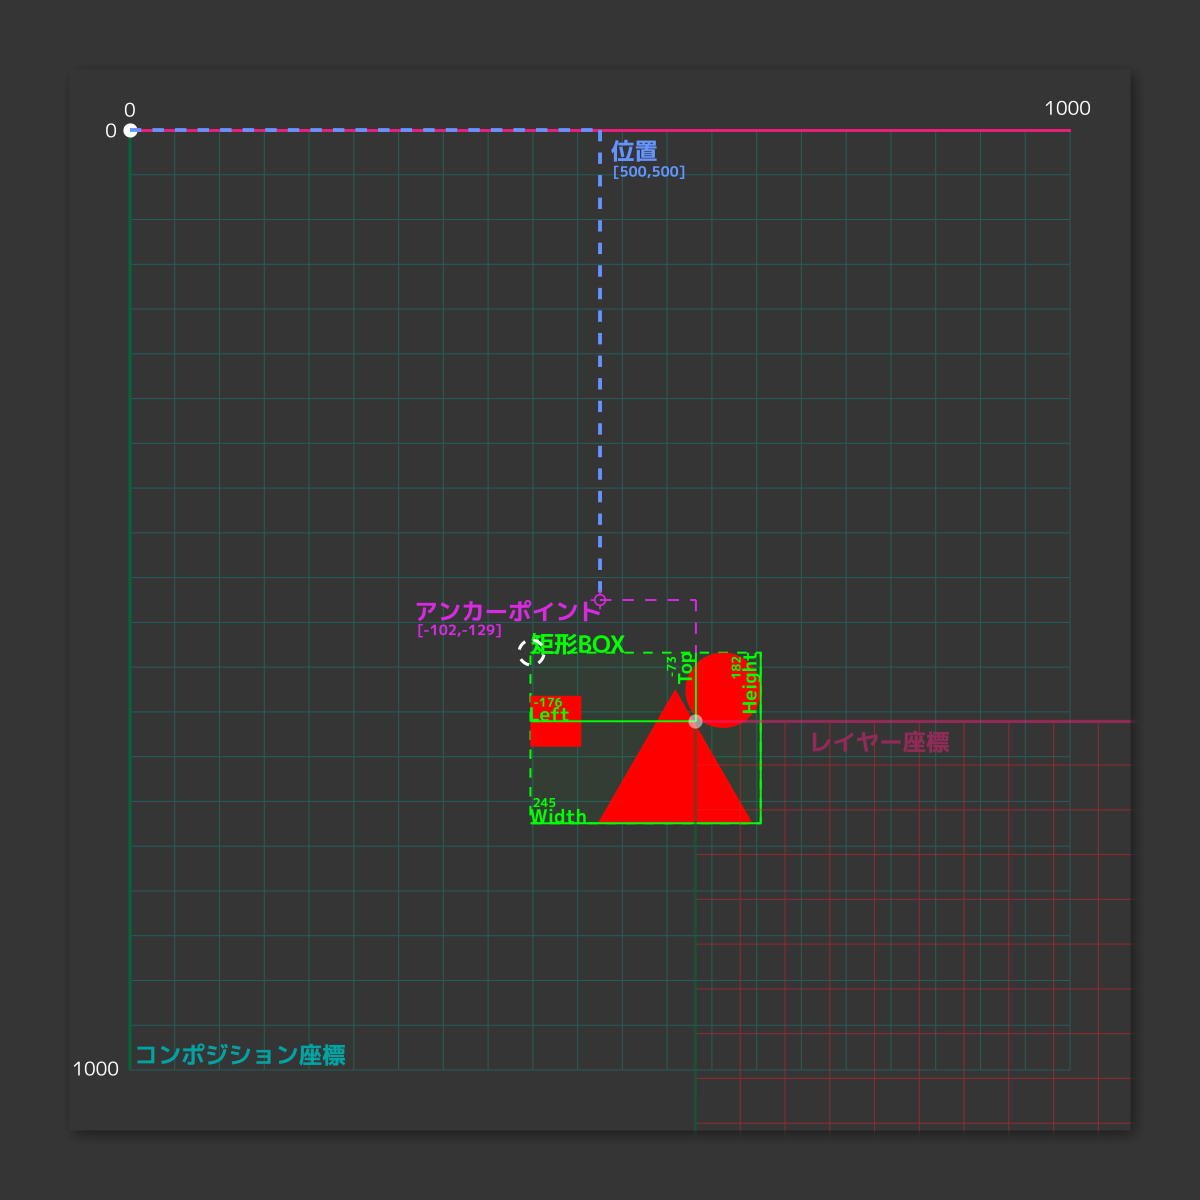
Apple風
題名
原理
作成
作成日 : 2021-03-13
位置、アンカーポイント、SourceRectAtTimeの関係整理

AfterEffectsでエクスプレッションを記述していると、SourceRectAtTimeを使用することが時々あります。テキストに追従する背景Boxがよくある例です。

あまり複雑なエクスプレッションは書かないので、その場その場でデバックしながら済ませていましたが、ちゃんと理解しておいたほうが良さそうなので自分用にまとめてみます。

YouTube動画を隠す ◀

原理
1. 出てくるキーワード
  • コンポジション座標 : 作業コンポジションの座標
  • レイヤー座標 : 対象レイヤーの座標
  • 位置 : 対象レイヤーの位置
  • アンカーポイント : 対象レイヤーのアンカーポイン
  • 矩形BOX : 対象レイヤーのSourceRectAtTimeで取得できる矩形バウンディングボックス
2. コンポジション座標
全ての基準となる座標で、左上から始まります。
今回は1000×1000のコンポジションを作成したと仮定します。
3. レイヤー座標
レイヤー内部の基準となる座標です。
レイヤー作成時にコンポジション座標の中央から作成されます。
コンポジション座標と同じく、左上から始まります。
4. アンカーポイント
レイヤーの回転、スケールなどの基準となる点です。
レイヤーの位置プロパティの座標はアンカーポイントの位置を示しています。

レイヤーのアンカーポイントプロパティを変更した場合、アンカーポイントの位置は変わらず、レイヤー座標の位置が相対的に移動します。
5. 矩形BOX
sourceRectAtTime()で取得できる、レイヤーの矩形BOXです。
  • Left : レイヤー座標の基準からのBOX左側の距離を取得
  • Top : レイヤー座標の基準からのBOX上側の距離を取得
  • Width : 矩形BOXの幅を取得
  • Width : 矩形BOXの高さを取得
6. 組み合わせ
この4種類を組み合わせることで、任意の点を取得できます。
作成
1. A:レイヤー座標の基準点
= 位置 - アンカーポイント
const layer = thisComp.layer('tarLayer')

const tarPosition = layer.position - layer.anchorPoint

tarPosition
2. B:レイヤーの矩形BOX左上
= A + [ 矩形BOX.left , 矩形BOX.top ]
= 位置 - アンカーポイント + [ 矩形BOX.left , 矩形BOX.top ]
const layer = thisComp.layer('tarLayer')

const tarPosition = layer.position - layer.anchorPoint
const tarRect = layer.sourceRectAtTime(time + layer.inPoint)
const tarLeftTop = tarPosition + [tarRect.left, tarRect.top]

tarLeftTop
3. C:レイヤーの矩形BOX中央
= B + [ 矩形BOX.width /2, 矩形BOX.height /2 ]
= 位置 + アンカーポイント + [ 矩形BOX.left + 矩形BOX.width /2 , 矩形BOX.top + 矩形BOX.height /2 ]
const layer = thisComp.layer('tarLayer')

const tarPosition = layer.position - layer.anchorPoint
const tarRect = layer.sourceRectAtTime(time + layer.inPoint)
const tarCenter =
  tarPosition +
  [tarRect.left + tarRect.width / 2, tarRect.top + tarRect.height / 2]

tarCenter